
Install guide · about 5 minutes
How to add an AI chat widget to any website
Add the Deskdove AI chat assistant to any website, including Webflow, Shopify and hand-coded sites: paste one script tag before </body>.
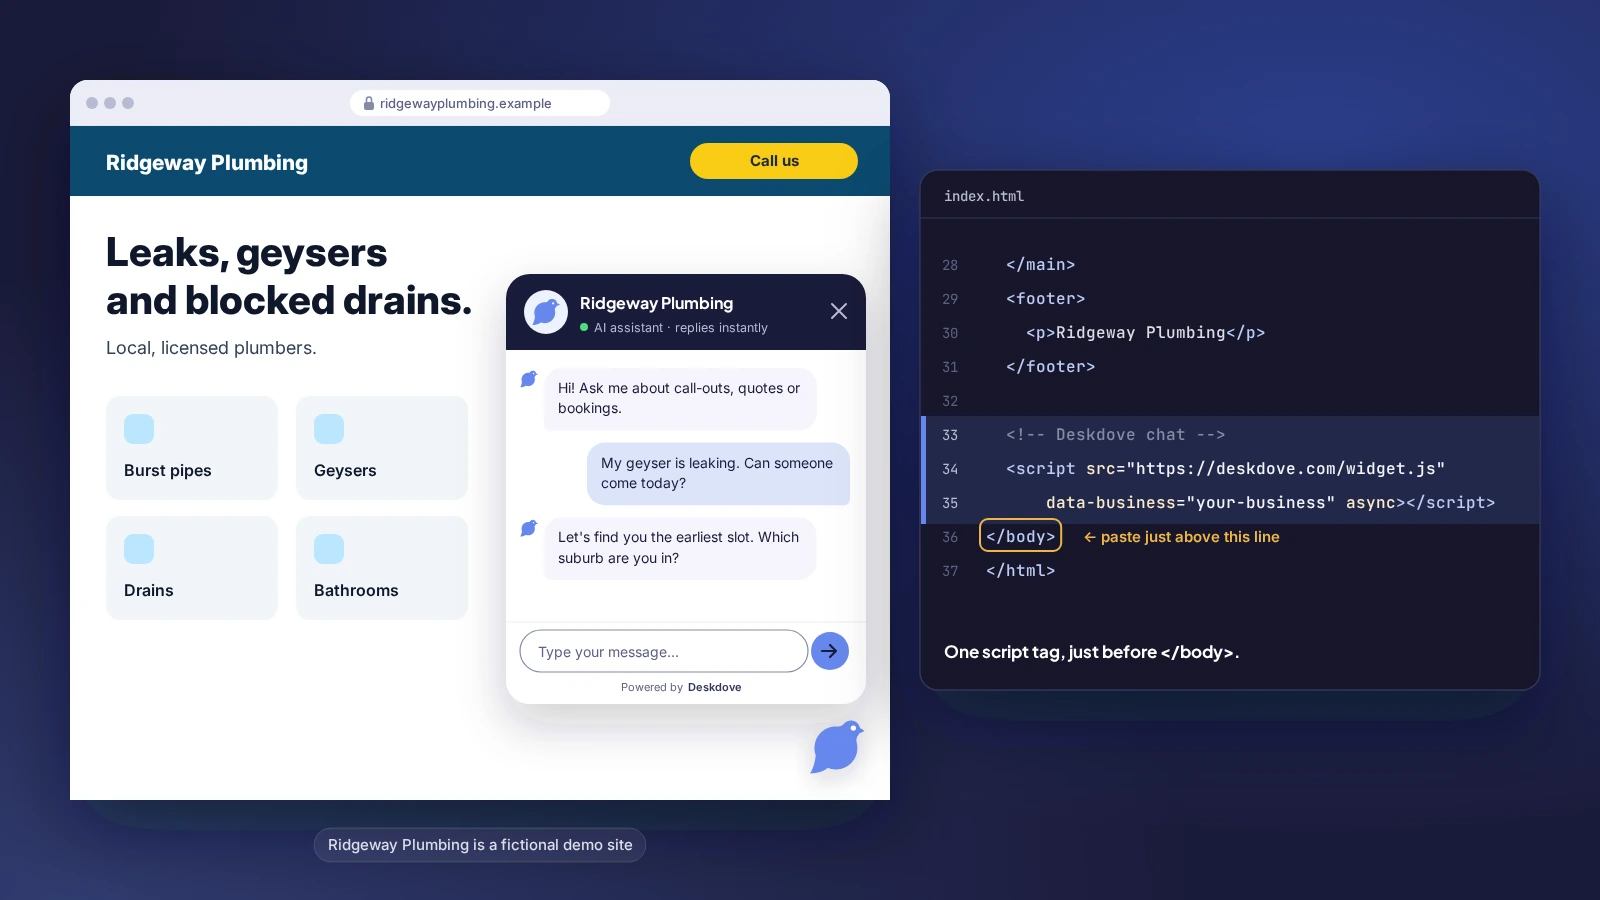
Any site that lets you add a script works: paste the one-line snippet just before the closing </body> tag, ideally in a shared footer or template so it's on every page.
Copy your snippet
Copy the one-line snippet below.
<script src="https://deskdove.com/widget.js" data-business="your-business" async></script>This is a placeholder. Sign up free to get your snippet
Find your footer or template
Open the file or setting that's shared by every page, such as a footer include, layout template or your site builder's "custom code" or "footer code" setting.
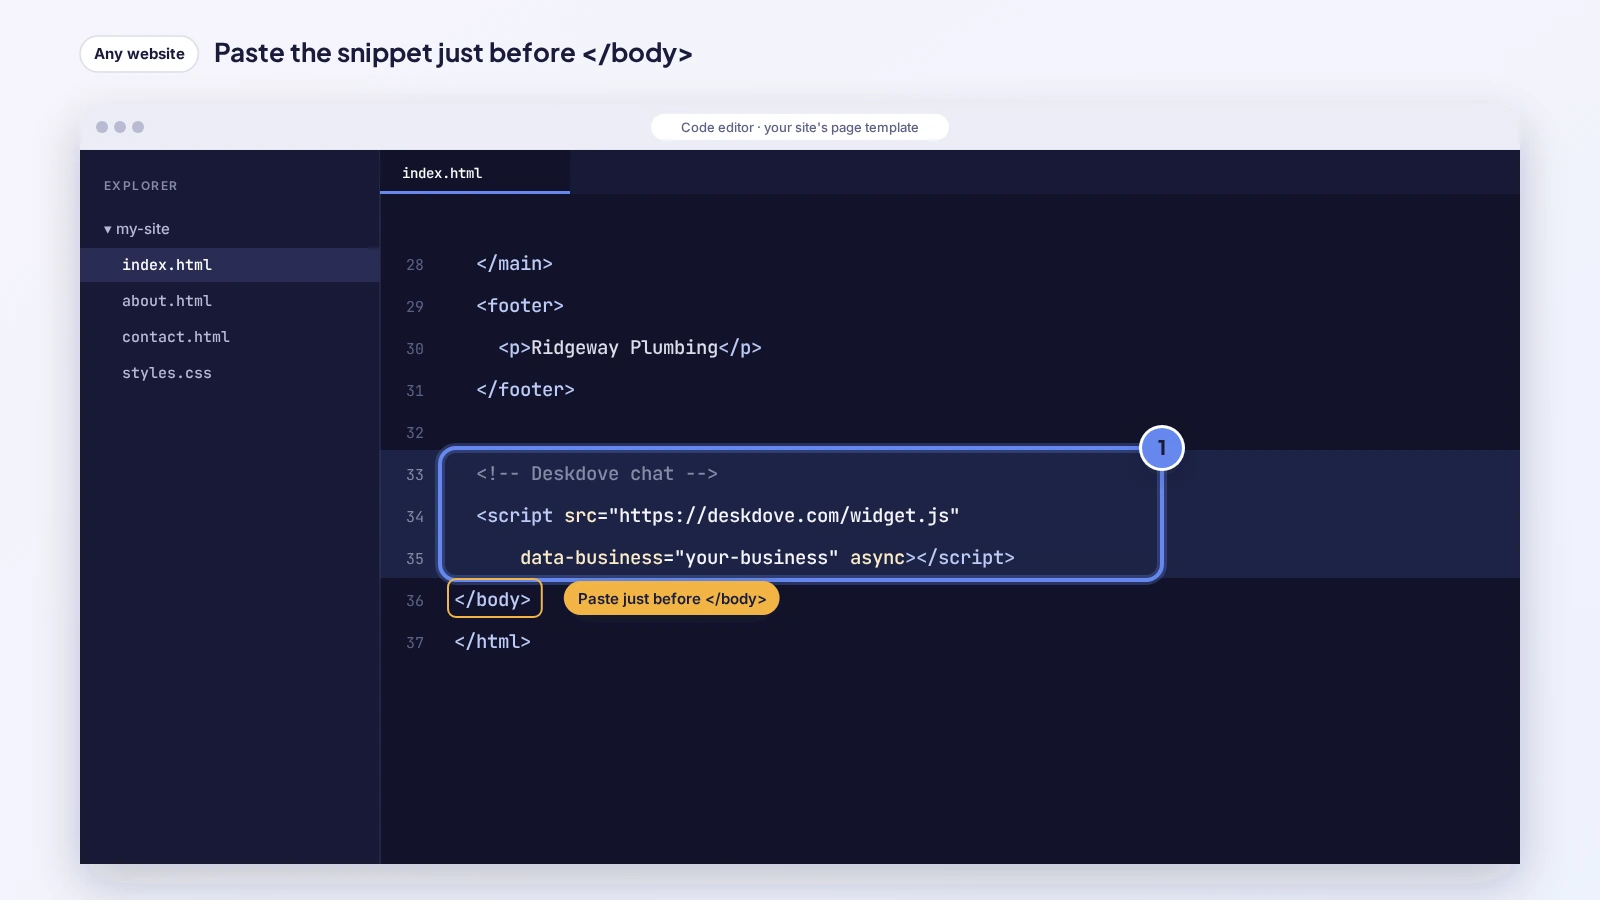
Paste before </body>
Paste the snippet on the line just before </body>. It loads asynchronously, so it won't slow your page down.
Publish
Save and publish or deploy your site as usual.
Check it's working
Open your site in a private window
Use a private or incognito window so you see what a new visitor sees (and no old cache).
Look for the chat button
The chat launcher appears in the bottom corner of the page within a few seconds.
Send a test message
Open the chat and send a message, such as "Hi, this is a test".
See it in your Inbox
Open Inbox in your Deskdove portal. Your test chat shows up there straight away.
Rather we did it? Book a free assisted install and we'll set it up with you on a short call.
Get your own snippet
Your portal has a ready-to-paste snippet with your business already filled in, plus these steps.
Sign up free to get your snippet